How To Make A Gallery Wall
A practical step-by-step guide to how to make a gallery wall, including preparation, instructions, common issues, tips, and next steps.
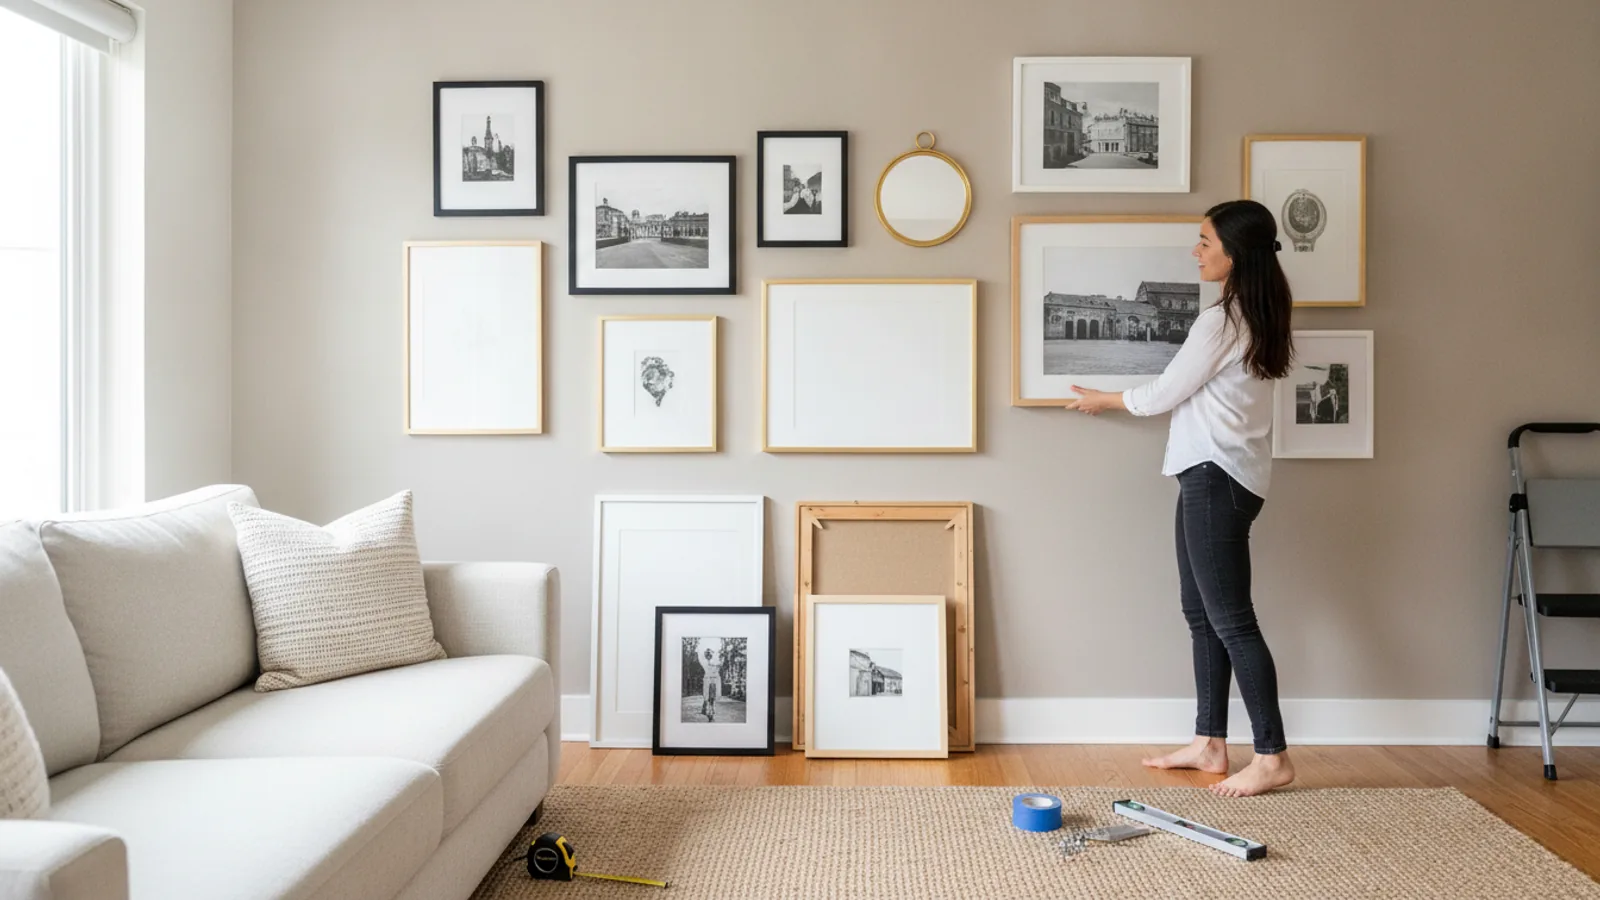
How To Make A Gallery Wall
This guide explains how to approach how to make a gallery wall, including the preparation, practical steps, common mistakes, and final checks that help you finish with confidence.
Before You Start
Step-by-Step Instructions
Quick Reference
Common Problems When You Make a Gallery Wall
Even with careful planning, you might encounter a few hurdles when creating your gallery wall. Here are some common issues and how to resolve them:
Crooked Frames
One of the most frequent complaints is frames that just won't stay straight. This can happen if the hook isn't perfectly level, or if the wire hanger on the back of the frame allows too much movement.
Fix: Use a spirit level on each frame and gently adjust. For frames that consistently tilt, try placing a small amount of adhesive putty (like Blu-Tack) on the bottom two corners of the frame, pressing it against the wall. This will hold the frame securely in position.
Uneven Spacing
Sometimes, despite your best efforts, the gaps between frames look inconsistent. This can make the whole gallery wall feel messy rather than cohesive.
Fix: This is where the paper templates (Step 3 & 4) are invaluable. If you've already hung the frames, you might need to take a few down. Re-apply the templates, carefully measuring the space between each one (aim for 5-8 cm / 2-3 inches generally). Use a ruler or a consistent object (like a small block of wood) to maintain even gaps while re-taping the templates before re-hanging.
Wall Damage from Mistakes
Accidentally putting a nail in the wrong spot or using the wrong type of fixing can leave unsightly holes in your wall.
Fix: For small nail holes, a bit of spackle or wall filler can easily patch it up. Apply with a putty knife, let it dry, then sand smooth and touch up with paint. For larger holes or damage from incorrect fixings, you may need a more substantial repair, possibly involving plasterboard patching. Always verify your marks with templates before making holes to minimise mistakes.
Overwhelmed by Choice
With so many photos and pieces of art, it can be difficult to decide what to include or how to arrange everything. This can lead to decision paralysis.
Fix: Start small. Choose a focal point or a few favourite pieces that absolutely must be included. Build around them. Consider creating a themed gallery wall (e.g., black and white photos, travel memories, nature scenes) to narrow down your choices. Remember, you don't have to use every single piece you own.
Lack of Cohesion
A gallery wall can look disjointed if the frames, styles, or colours don't work well together, even if individually they are beautiful.
Fix: Try to find a unifying element. This could be using frames of the same colour (e.g., all white, all black, all wood), or sticking to a specific colour palette for the art itself. Mixing different frame styles is fine, but try to tie them together with consistent matting or by arranging similar colours next to each other. Don't be afraid to paint frames to achieve a more cohesive look.
Advanced Tips for How To Make A Gallery Wall
Once you’ve mastered the basics of how to make a gallery wall, you might want to explore ways to make your display even more unique and impactful. Here are some advanced tips to elevate your design:
Mix in Unique Objects and Textures
Beyond traditional framed art, consider incorporating three-dimensional objects. Small wall-mounted shelves can hold tiny sculptures, potted plants, or collectible items. Mirrors of various shapes and sizes can add light and depth. Think about textiles, too – a small woven tapestry or macrame hanging can introduce softness and texture, breaking up the flatness of frames.
Experiment with Asymmetrical Layouts
While a grid layout is classic and neat, an asymmetrical arrangement can feel more dynamic and modern. Instead of perfectly aligning edges, aim for balance through visual weight and varied spacing. This allows for more organic growth over time as you add new pieces. The key is still to ensure a sense of harmony, even if it's not perfectly symmetrical.
Incorporate Lighting
Highlighting your favourite pieces with subtle lighting can transform your gallery wall. Picture lights that mount above individual frames add a touch of sophistication and draw attention to specific artworks. Battery-operated puck lights can also be discreetly placed on shelves or behind certain pieces for a warm glow. Ensure any lighting enhances, rather than distracts from, the art.
Use a Picture Ledge
For those who love to change their displays frequently, a picture ledge offers incredible flexibility. Instead of hanging each frame individually, install one or more long, narrow shelves specifically designed for displaying art. You can lean frames of various sizes against the wall on the ledge, easily swapping them out or rearranging them without making new holes. This is also great for displaying books or small decorative items alongside your art.
Create a Themed or Colour-Coded Wall
Take your gallery wall to the next level by committing to a strong theme or colour palette. This could be a wall dedicated entirely to travel photography, black and white portraits, abstract art in cool tones, or even a collection of vintage botanical prints. A cohesive theme creates a powerful visual statement and makes the collection feel curated and intentional.
How To Make A Gallery Wall FAQ
How high should a gallery wall be?
Generally, the centre of your gallery wall (or the middle of the most prominent piece) should be at eye level for an average person, which is typically around 145 cm (57 inches) from the floor. If hanging above furniture, ensure the bottom of the lowest frame is at least 15-20 cm (6-8 inches) above the top of the furniture.
Can I mix different frame styles and colours?
Absolutely! Mixing different frame styles, colours, and materials can add character and a unique, eclectic feel to your gallery wall. To maintain a sense of cohesion, try to find a common thread, such as a consistent matting colour, a limited colour palette for the art itself, or a dominant frame material (e.g., mostly wood, with a few metallic accents).
What's the best way to get even spacing between frames?
The most effective method is using paper templates taped to the wall. Once you have your desired layout, you can use a ruler or a consistent spacer (like a small block of wood or a piece of cardboard) to ensure even gaps between each template before marking your hook positions. A gap of 5-8 cm (2-3 inches) is a good starting point.
How do I hang a gallery wall on plasterboard without damaging it?
For lighter frames, standard picture hooks designed for plasterboard, or adhesive picture hanging strips (like Command Strips) can work well. For heavier frames, you will need plasterboard specific wall anchors or toggles. These expand behind the plasterboard to create a secure fixing. Always follow the manufacturer's weight guidelines for any fixing method.
What if I want to change my gallery wall later?
That's the beauty of a gallery wall – it can evolve! If you’ve used individual hooks, you might have small holes to patch and paint. For maximum flexibility, consider using a picture ledge system where frames simply lean against the wall, allowing for easy rearrangement without new holes. Adhesive strips are also great for temporary or frequently changing displays as they are often removable without wall damage.
Final Checklist for How To Make A Gallery Wall
Before you consider your gallery wall complete, run through this quick checklist to ensure everything is perfect and secure:
- All items gathered: Have you collected all the art, photos, and objects you wish to display?
- Layout planned: Did you arrange your gallery on the floor first and take photos of your preferred layouts?
- Templates created: Have you cut out paper templates for each item and marked the precise hanging point?
- Wall layout confirmed: Are the paper templates securely taped to the wall, and have you checked the overall arrangement and spacing?
- Hook positions marked: Have you accurately marked the hanging spot for each item on the wall?
- Fixings installed correctly: Are all nails, hooks, or wall anchors securely in place and appropriate for your wall type and frame weight?
- All pieces hung: Is every piece of art or object securely hanging on its designated hook?
- Frames levelled: Have you used a spirit level to ensure each frame is perfectly straight?
- Overall balance checked: Have you stepped back to assess the entire gallery wall for balance and visual appeal?
- Clean-up complete: Are all pencil marks, fingerprints, and stray tape removed from the wall and frames?
- Safety check: Are all pieces secure and unlikely to fall or pose a hazard?
With this checklist complete, you can now enjoy your beautifully curated gallery wall!